

TL;DR: Long's Peak is a 14,259' mountain in Rocky Mountain National Park with no easy way to the top. Even the standard route is a 16 mile, sunup-to-sundown day with real exposure. Getting up safely comes down to three things: acclimatizing to altitude, training on steep uneven terrain (not just a gym), and matching your gear and skills to your route. The Keyhole Route suits most first-timers, The Cables Route rewards climbers with some 5th-class experience, and The Diamond is reserved for solid 5.10-5.11 rock climbers who can perform at altitude. Colorado Climbing Compnay guides all of these routes and can help you figure out which one fits where you're at right now.
They call it Long's for a reason! Having guided people to the summit of the monarch of Rocky Mountain National Park numerous times we know a lot about the peak. In addition helping our own clients with their struggles en route to the summit we've also had the opportunity to watch a variety of private parties from trail runners out for a quick jog up the standard Keyhole Route to new multipitch climbers having a rough time on The Diamond (don't worry we've been there) we've seen all sorts of struggles and successes from a variety of parties. We're going to cover a few things so, whether you're hiring a guide to push your limits, or looking to try on your own you've got a strong base of knowledge from which to approach this awe inspiring peak.
With over a hundred different options for routes that range from straightforward scrambles to high end mixed climbs there are a lot of different ways you can climb Long's Peak. We'll relate some of the info to different climbs we have experience with and a general overview of some of the most popular routes near the end as well as some routes that deserve more attention than they get.
Basic Facts for Climbing Long's Peak
Regardless of which route you take there are some basic things you should know about Long's Peak
Altitude: 14,259'
Location: Rocky Mountain National Park near Estes Park, Colorado
Altitude Gain from Long's Peak Trailhead: 4800'
Mileage Range for Common Routes: 12-16 miles roundtrip
Even by the Keyhole, the easiest route on Long's Peak, it is an involved day and for the average person you should prepare to be outside from sunup to sundown. If you're wondering how long it is to climb Long's then it depends. We'll firm up that answer in our next topic which is fitness.
It is one of the hardest 14ers in Colorado having no easier hiking route to it's summit. A summit which is surprisingly big and flat.
Permit and Passes Note: Long's Peak is in Rocky Mountain National Park. It requires a timed entry permit for parking, a parks pass for entry to certain trailheads, and a backcountry camping or bivvy permit if you're staying overnight. Not psyched on dealing with all that, give us a call and let us sweat the details.
How Fit Do You Need to Be to Climb Long's Peak?
Everyone climbs their own climb so the question of how fit do you need to be and how hard it is to climb depends a little bit on what route you're thinking of going on.
Regardless of route you will have a pretty good hike just to get to the base of any route. There are essentially two main ways and one minor way people get to Long's. The first is the Long's Peak Trailhead which is the start for everyone who's doing anything from The Keyhole to Clark's Arrow, which is to say most people. The other most common option is from Sandbeach Lake in the Wild Basin part of the park. This is where people wanting to do Keplinger's Couloir tend to start. Finally is the Glacier Gorge Trailhead which the few hardy souls looking to climb The Trough to the summit will use. All of them start around 9000' and being a 14er it's worth discussing acclimatization.
Why Acclimatization Matters
Even if you're coming from Denver it is worth spending a day hiking to a lower summit or camping overnight to help your body adjust. If you're not coming from a location with altitude it's not only helpful, it's critical. Too often people come from low elevation areas like Kansas or Florida and don't understand why they're struggling and the answer is their body is oxygen starved.
As an example one of our regular clients from the East Coast would leave you in the dust at a lower elevation but as soon as they hit 10k that 2-3mph pace became .25-.5mph. No matter how fit you are if your body can't absorb more oxygen into your blood stream your muscles will use other energy systems to supplement the lack of oxygen, primarily anaerobic processes which means your muscles will start to burn and eventually they'll stop working until you give them a rest.
Often when we have clients who come from low elevation areas and want to climb something at a higher altitude we'll suggest dropping down a whole number grade. It might hurt their ego a little but you get pumped faster and you won't be able to hang on as long as you do normally. Same thing for hiking. You might be running marathons at sea level but you're going to only have access to a third the oxygen at the summit as you're used to. Unless you're genetically gifted with the sort of physiological adaptations common in people from the Andes or Himalaya you're going to have to either accept a slower pace or take more time to let your body catch up.
While some of the basic adaptations start within a day or two full acclimatization takes several weeks for most people. Even guides in the early season leading 14er trips will be slower than at the end of the summer. The more time you can spend at altitude the better. Often this is why we suggest three day Long's Peak trips. It gives a longer window for your body to adjust and gives some wiggle room if you're not feeling the greatest the next day or weather might be an issue.
Carry Heavy Things Uphill on Steep Uneven Terrain
Our bodies get used to what we use them for most and if you don't live somewhere with steep hills then your body is not going to be prepared to do that for 6-8 miles straight on rocky terrain before doing it in reverse another 6-8 miles. Every single climb on Long's Peak has steep rocky hikes to get to it. The trails to Chasm Lake, The Boulderfield, and Sandbeach Lake aren't the steepest in Colorado but if you're in trouble if that part saps your energy because you haven't even gotten to the hard stuff.
So how do you train that if you don't have access to big hills or mountains? Gyms can be a good option. Plenty of gyms have a stair stepper machine or even just walking the stairs of a tall building with a heavy pack helps. Progressive overload is the name of the game. Get to the point you can walk up steep stairs for a mile. Then add some weight. Then do it faster.
Getting to the point where carrying a 30 lb backpack uphill or upstairs for a mile or two shouldn't feel overwhelming. Until then you're going to be on the struggle bus.
Other Fitness Exercises:
-box jumps
-squats and other variations (split squats, goblet squats, etc).
-weighted lunges and step ups
-calf raises and lowers.
Sprints and other running training is often an underutilized part of a training regime for endurance events. While Long's may less than a half marathon in length the ability to move quickly on the lower portions will help give you more time for the steeper and more difficult sections.
Also don't forget that uphill is only half the route. You still have to walk down the thing! A lot of your control and speed on the downhill is the eccentric loading of your quad muscles. The above exercises can help with that but it's also important to consider that most of the terrain in the mountains is uneven. Hiking on rough ground is a great way to train the smaller muscles that support our ankles. If all you do is hit the gym you may find yourself struggling to maintain your balance because those smaller support muscles do not get challenged with gym movements that frequently occur in a single plane of motion. Moving on uneven terrain, even just in sand or rip-rap along a lake shore can help improve your fitness to avoid twisting an ankle.
Balance is also another large part of stability on big mountains like Long's Peak so core exercises will be a big part of any training plan. Look at exercises like:
-glute bridges and hip thrusts
-sandbag squats and get ups
-mountain climbers
-general ab workouts like situps and planks
Steep Climbing Specific:
While the above exercises help with the baseline fitness for some of Long's more mountaineering type objectives some of the steeper objectives require some sport specific training. If you're planning to climb The Diamond or some of the other higher end technical ice and rock routes on the peak then spending time sport climbing or gym climbing can be good cross training to give your legs a break but keep you on the right path.
The more technical climbing routes on Long's Peak are pretty challenging and you need to have a broad base of outdoor climbing experience before attempting them. Often when people reach out wanting to climb The Diamond and we haven't previously worked with them we'll suggest a shakedown day on something like The Petit or Ellingwood Arete where we can see them move on terrain at altitude where there is less consequential terrain before we have to put them on the scarier parts where we need to move efficiently in terrain that can have severe consequences if people don't move carefully.
What Should You Expect Mentally on Summit Day?
If you've never attempted a bigger mountain and you're not someone who's done a lot of outdoor activities it can be a shock to realize you're going to be moving constantly for 12-18 hours straight. That can really break people who might be fit but are used to taking a rest, having regular access to food and water.
Climbing Long's Peak isn't only a physical endurance trial it's a bit of a mental one.
Timing: Depending on the itinerary you're going to be starting somewhere between midnight and 5AM. Surprisingly there are frequently two types of people who tend to not have major issues with this, physical laborers and those in the medical field. Those and other people who commonly are on their feet for very long shifts and odd hours tend to be less drained. For the average person who isn't used to working a triple shift or labor all day the early start alone can really put people in the red for energy levels. Try getting up to do a hard workout on three or four hours of sleep to see how it feels.
Discomfort: You're either carrying a day pack of about 15 lbs or an overnight pack for a few days that may weigh 30-40 lbs. You're carrying it for many hours The food you want you'll have to carry. The water you'll have to carry or treat along the way. We get used to the convenience of air conditioning and refrigeration. We need to prepare ourselves for austerity, inconvenience, and an indifferent environment. While it may sound a bit harsh it's often one of the things that draws us to the mountains. Your success isn't dependent on desire or wits. Will power and internal drive will help more but even then sometimes the mountains say no.
Weather: While it plays into the discomfort thing it's really kind of a whole beast unto itself. We often schedule trips around weather to avoid getting totally hosed but sometimes people's schedules don't allow for it. Post holing for hours on end or the drone of constant wind in your face can start to get on your nerves after a long time. Even sunshine can be a danger where the air is thin if you don't protect yourself.
It helps to be able to tune things out. Often with guests people will ask if I'm humming or whistling. When you're trudging through some deep snow or a steady head wind it helps keep me in a positive frame of mind and more focused on just putting one foot in front of the other.
What Gear Do You Need to Climb Long's Peak?
There are essentially three types of climbs on Long's Peak. Semi-technical routes like scrambles and snow climbs, classic mountaineering routes with a mix of terrain but lower difficulty, and high end technical routes. What you need to bring will depend on what kind of route you're doing. Regardless of the type of route involved there a few things that you'll need on any climb:
Baseline Equipment
Navigation Tools: Even if you're hiring a guide it's always nice to know where you're at or where you're going. Simple phone apps like Caltopo are our favorite. While few people bring a map and compass I will say it's lighter than a backup navigation tool like a GPS or a backup battery.
Weather appropriate clothes: It's going to be change seasonally and depend a bit on the aspect but below are some of the basics. An extra layer is worthwhile in case it's colder than you expect and cotton for the most part is best avoided. Footwear will be required but we'll address the specifics lower down.
Late Fall to Early Spring: bring your base layers and that puffy. Likely going to need mountaineering boots for most of, if not all, of the climbs depending on where the snow starts (there will be snow). Snow means reflective sunlight so glacier glasses or good sunglasses (Cat. 3 or 4). Gloves and a hat as well as at least two pairs of good synthetic socks. A heavier duty waterproof layer for your legs is required and depending on weather a softshell might be fine. If you're not familiar with layering for winter check out our How to Climb 14ers in Winter post.
Late Spring to Early Fall: Temperatures are usually milder at this time. Most of the snow has melted but not all. Check the NPS webcams and if there is significant snow you probably should bring all the things you'd bring for the previously mentioned season.
First Aid: always a good idea to have some basic supplies for injuries in the backcountry. Help can be a ways away.
Emergency Communication: As guides we usually opt for the satellite communication devices but as technology evolves your phone may have that functionality. Don't forget to test before going into the field.
Food: This could be it's own post but bring something that will sustain and fuel you. Think quick calories. Protein or fat heavy foods will often give you some intestinal distress when you're working really hard.
Water and Treatment: You don't have to bring all your water at once. Most climbs on Long's Peak are near a water feature like a lake or stream. We find it helps to be well hydrated leading up to the climbing days and then fill up along the way. A good water filter or treatment tablets will be much lighter than carrying 4-8 liters of water that you might want for the heavy physical output.
Sun Protection: Sun hoodies are some of our favorite clothing pieces on spring and summer snow, guides are almost always in sunglasses, and sunscreen in the strong reflected sun in the thin air is a must.
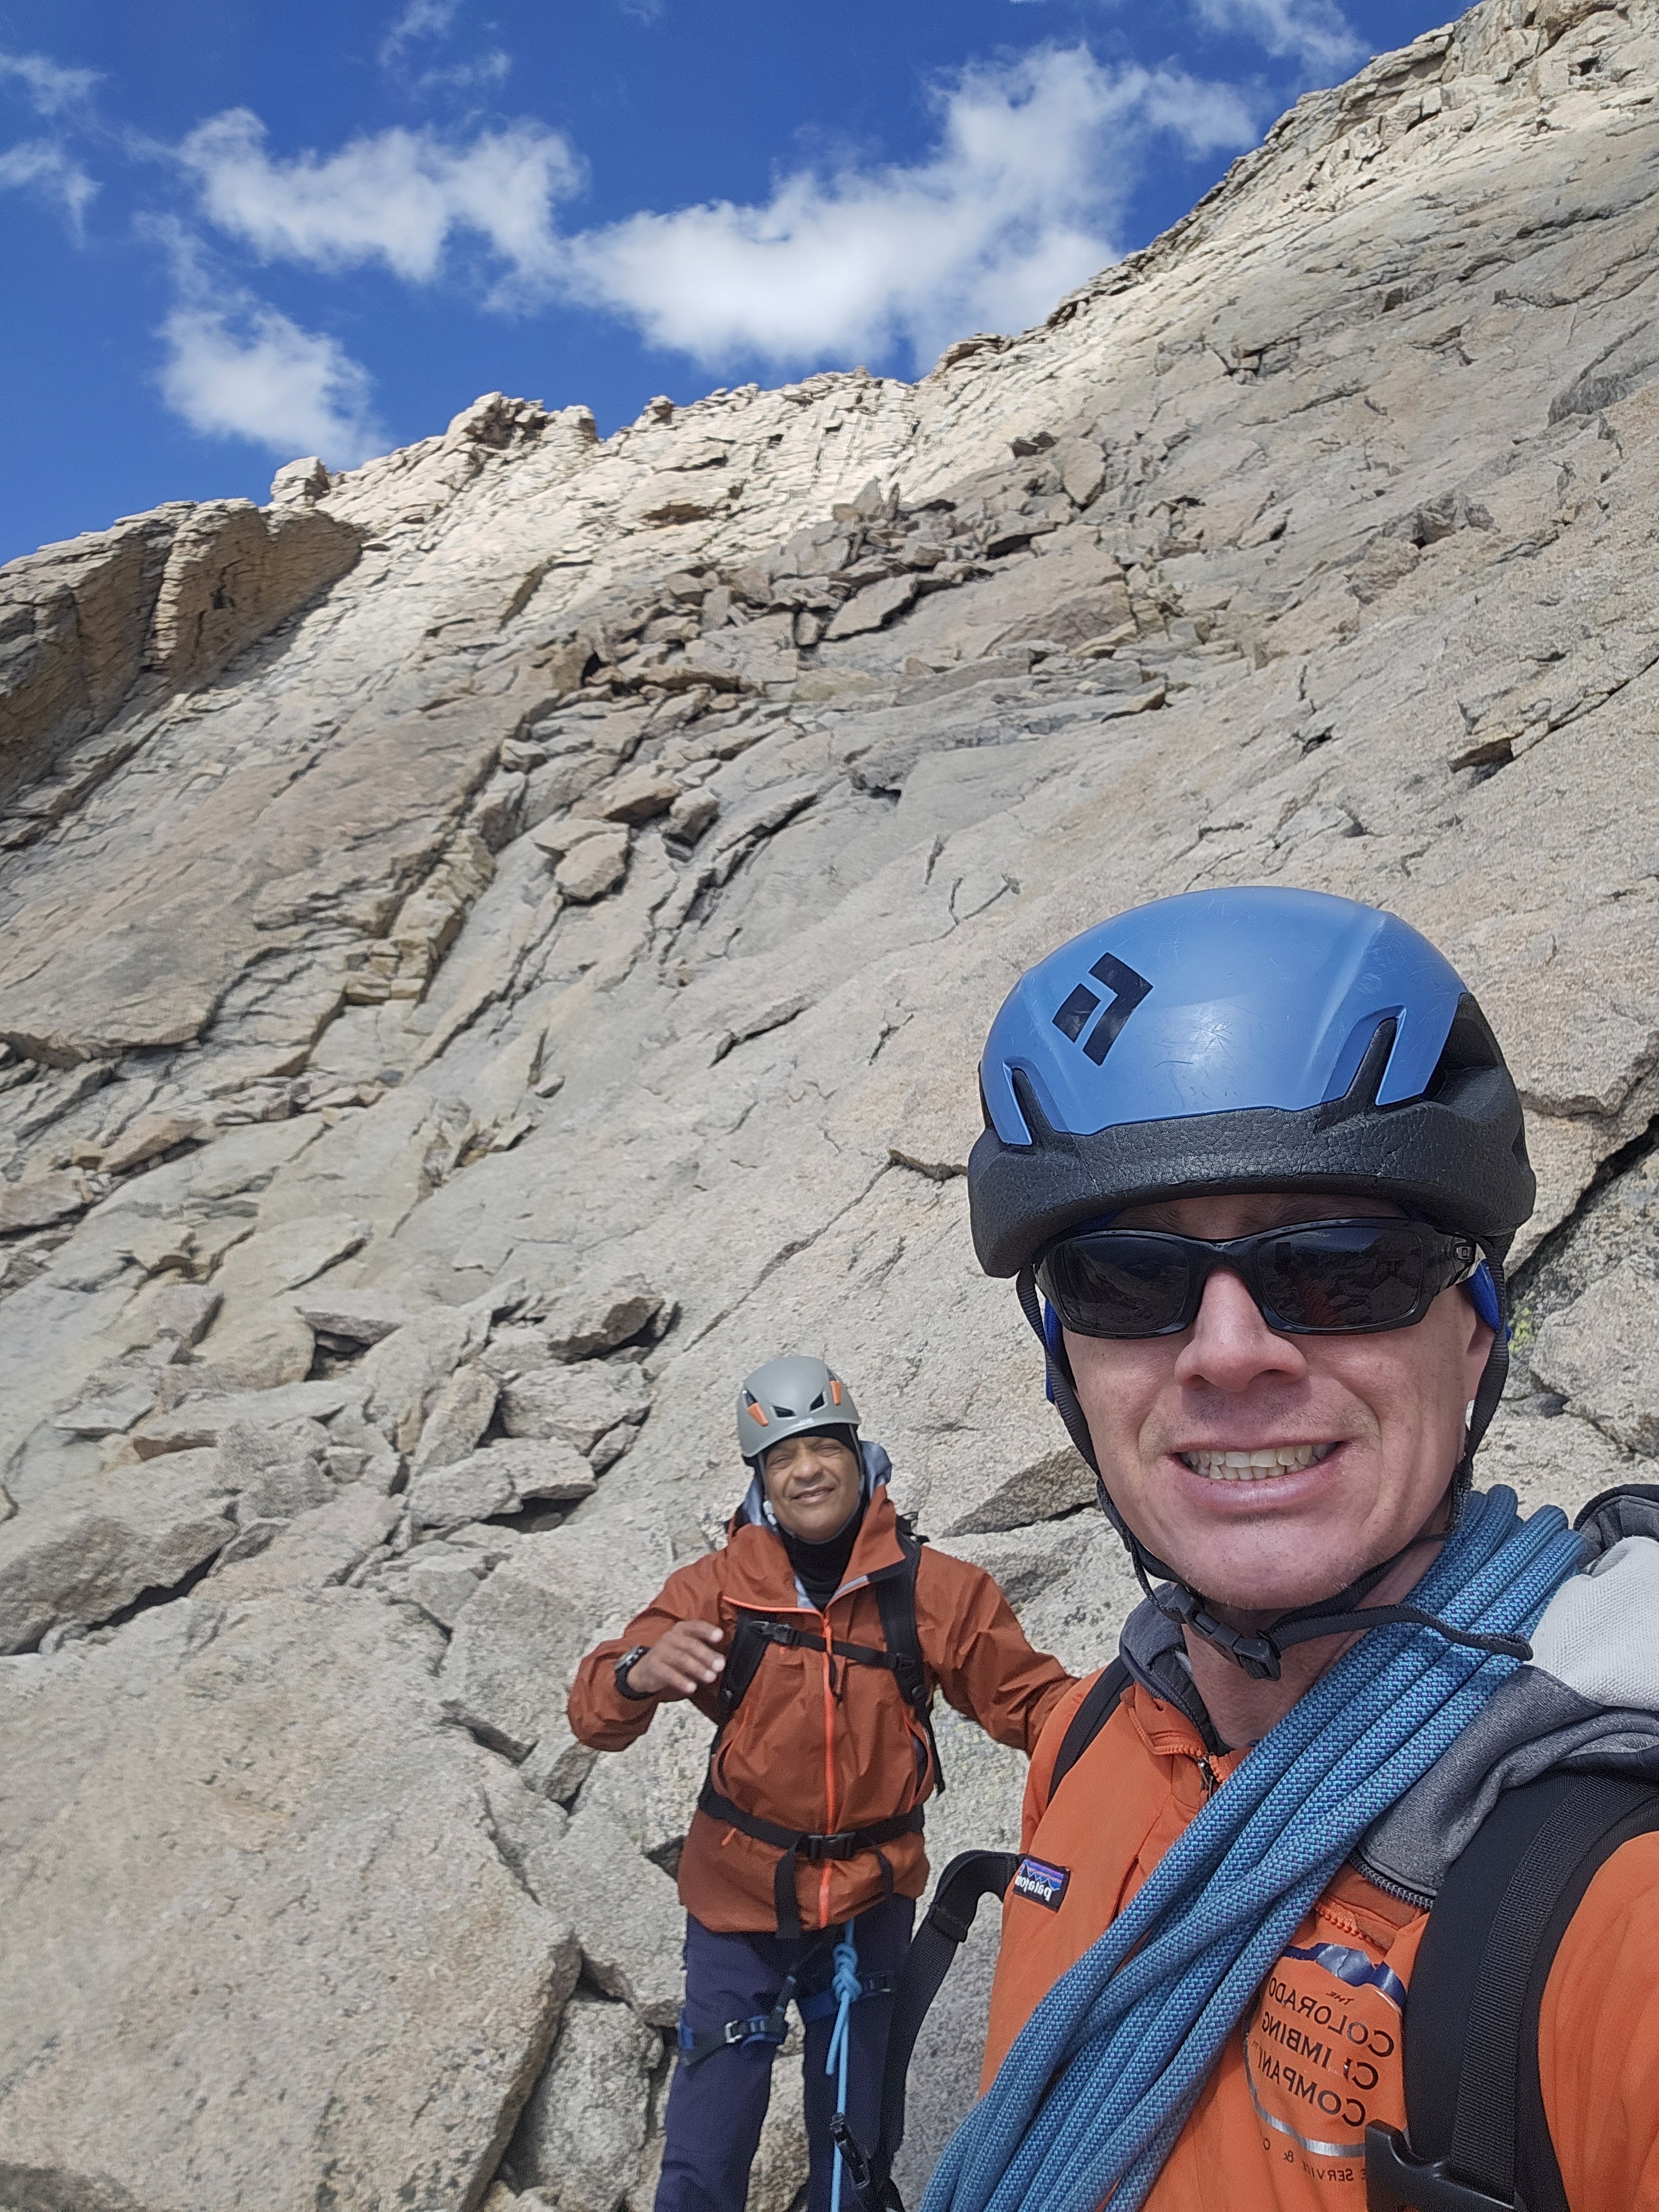
Helmet: No matter what route you take you should protect your brain. As one of the hardest 14ers in Colorado with no easy route to the top you will have overhead hazard and not wearing a helmet is simply not a smart option. Concussions are not cool.
Headlamp: You're likely starting in the dark and may be ending in the dark. If anything makes the day take longer you don't want to be feeling your way around or trying to use your phone to find your way along the trail or worse through more technical terrain.
These are just baseline equipment but some types of climbs will favor different equipment or more specific equipment that we'll get into now.
Scrambles and Classic Mountaineering Routes or Snow Climbs: These are routes that have some hands on type moves or significant exposure. They're not the highest difficulty but may feature lots of terrain changes. A couple good examples would be the standard Keyhole Route but also something like a link up of Lambslide to Kieners via Broadway Ledge.
Footwear: If you're on a route with significant snow then mountain boots are your ideal. The more snow or ice involved the sturdier the boot. Needs to be solid enough for crampons. For more rock scramble or low 5th class like The Cable's Route in summer conditions a solid approach shoe can be a good car-to-car piece. If you don't trust your ankles though a solid hiking boot for the approach is a worthwhile consideration.
Ropes: There are plenty of people who climb these without a rope. There are also plenty of people who get killed, injured, and rescued. This isn't a parenting post but one of the guides during a training said, "put in a piece for your mom" so worth thinking about when you're considering that runout or climbing un roped. For a lot of the more scramble type routes a short rope is a great tool. When guiding The Keyhole Route I usually just bring a skinny 30M rope. It's a great length for the difficulties and not terribly heavy.
Rock or Snow Climbing Protection: If you're climbing a snow route then an ice axe and crampons should be obvious. Certain routes in early ice or late season corniced conditions might necessitate a secondary tool but that's pretty condition specific. For more rock scrambles or low grade climbs it depends on your comfort level. I'll frequently bring 4 or 5 cams for something like The Cables where I'm pitching it out with clients. Maybe a cordelette and a couple lockers. Light is right so think small rack of gear. Enough so you're not decking. Same for routes with lower difficulty ice and snow like climbing Notch Couloir into Kiener's. You might bring an ice screw or two, maybe a picket depending on seasonal snows and temperatures but not a ton of stuff. I may or may not bring an actual belay device. If there is a lot of pitched climbing I will. Short pitches and intermittent climbing I may just end up using a body or terrain belay, maybe a munter.
High End Technical Routes: These are your harder ice and rock routes. They're condition specific and they're not going to be forgiving if you don't gear up appropriately. Light is right but don't freak yourself out trying to save a few ounces.
Footwear: If you're climbing a rock route you're probably doing approach shoes to the base and climbing shoes from there. Ice routes you'll probably be in mountain boots with with step in crampons for the duration and two ice tools. Lightweight is ideal but not flimsy.
Ropes: I'm usually bringing my skinny 60M ropes for these. I don't want to drag anything heavier than I have to when climbing my hardest at 13k. Most routes on the East face will have double rope rappels. There are ways to get by with a single rope but they are committing so you have to be cautious.
Rock and Ice Protection: Skimping here is most likely going to slow you down. Bringing one more cam is likely to keep you safer and the confidence you feel will help keep you moving efficiently. Don't go overboard though. Unless you're Mark Twight I'd probably suggest bringing a few more than six screws. Typically I'm bringing all or most of a double rack with draws, cordelettes, and belay devices.
What Skills Do You Need to Climb Long's Peak?
Basic Navigation: I remember when we went left at Chasm Junction. After the line of headlamps that was following us caught up the party asked if this was the way to The Keyhole. They were pretty frustrated when I said they were on the wrong side. There are plenty of sites with detailed route info but you need more than a picture of the route. You have to be able to actually navigate using a map tool. With modern GPS mapping apps and topo maps on your phone it's incredibly easy but still you need to spend some time ensuring you know how to do it.
Strength/Endurance: A little bit route dependent on which one you'll need more of but this is not the sort of climb to do off the couch. If you're not in good 14er shape then you need to get started.
Steep Ice/Snow/Rock Climbing Skills: Almost every route outside The Keyhole has some significant steep sections of rock, ice, or snow. That's not to say The Keyhole isn't steep but don't show up expecting you'll be able to figure out steep climbing that day. I remember one of our trips was someone with climbing experience who had never been in crampons before. The guide said he cruised up the Cables Route but having never descended in crampons before he slowed way down. We were about to call in a search party before he finally sent a message on what ended up being a 17 hour day. Guides are happy to work with you but that's a long day even for us.
Loose Rock Management: Long's Peak has some of the highest quality granite of any alpine area in all of Colorado but it's still an alpine area. Guides will often point out loose blocks here and there and they become more frequent on lower angle climbing but keep an eye out for those sort of things. While we all expect rockfall on popular routes that doesn't mean you want to be the one we are glaring at when you don't take care.
Belay Techniques: If you don't regularly climb you might be confused on how to use the rope. This is a large part of the teams security, even for guided trips. We make a habit of avoiding falling because it's both dangerous and embarrassing for a a guide. Nevertheless, rocks break and things are not 100% in our control. Having solid belay skills makes everyone safer. Everything from hip belays to auto blocking belay devices get used on Long's Peak so versatility is paramount.
What Are the Best Routes on Long's Peak?
Somewhere around the Homestretch on Long's Peak
Keyhole Route: Long's Peaks Standard Route
Route Basics: The Keyhole is the most common route taken to the summit of Long's. While it is the easiest route it is by no means easy or a hike. It is one of the longest and most involved routes on the peak. It almost circles around half the peak getting to the summit with long sections. There are essentially 5 major sections of The Keyhole Route once you get up to the Boulderfield.
Keyhole: This is rock that almost forms an arch near the Agnes Vaille shelter on the North side of Long's Peak. There is a little scramble to here and then you turn left and follow the bullseyes onto the next section.
The Ledges: In some ways the most inobvious part of the route finding as you traverse around the NW aspect of Long's Peak. Look hard for the most worn path and the bullseyes. It can be easy to take the wrong ledge. If you find yourself at a bigger cliff you probably missed a ramp leading to the next ledge up or down. These ledges and ramps have significant exposure but aren't too hard. You'll follow these across with some up and down till you start crossing a few gullies and eventually reach the next section.
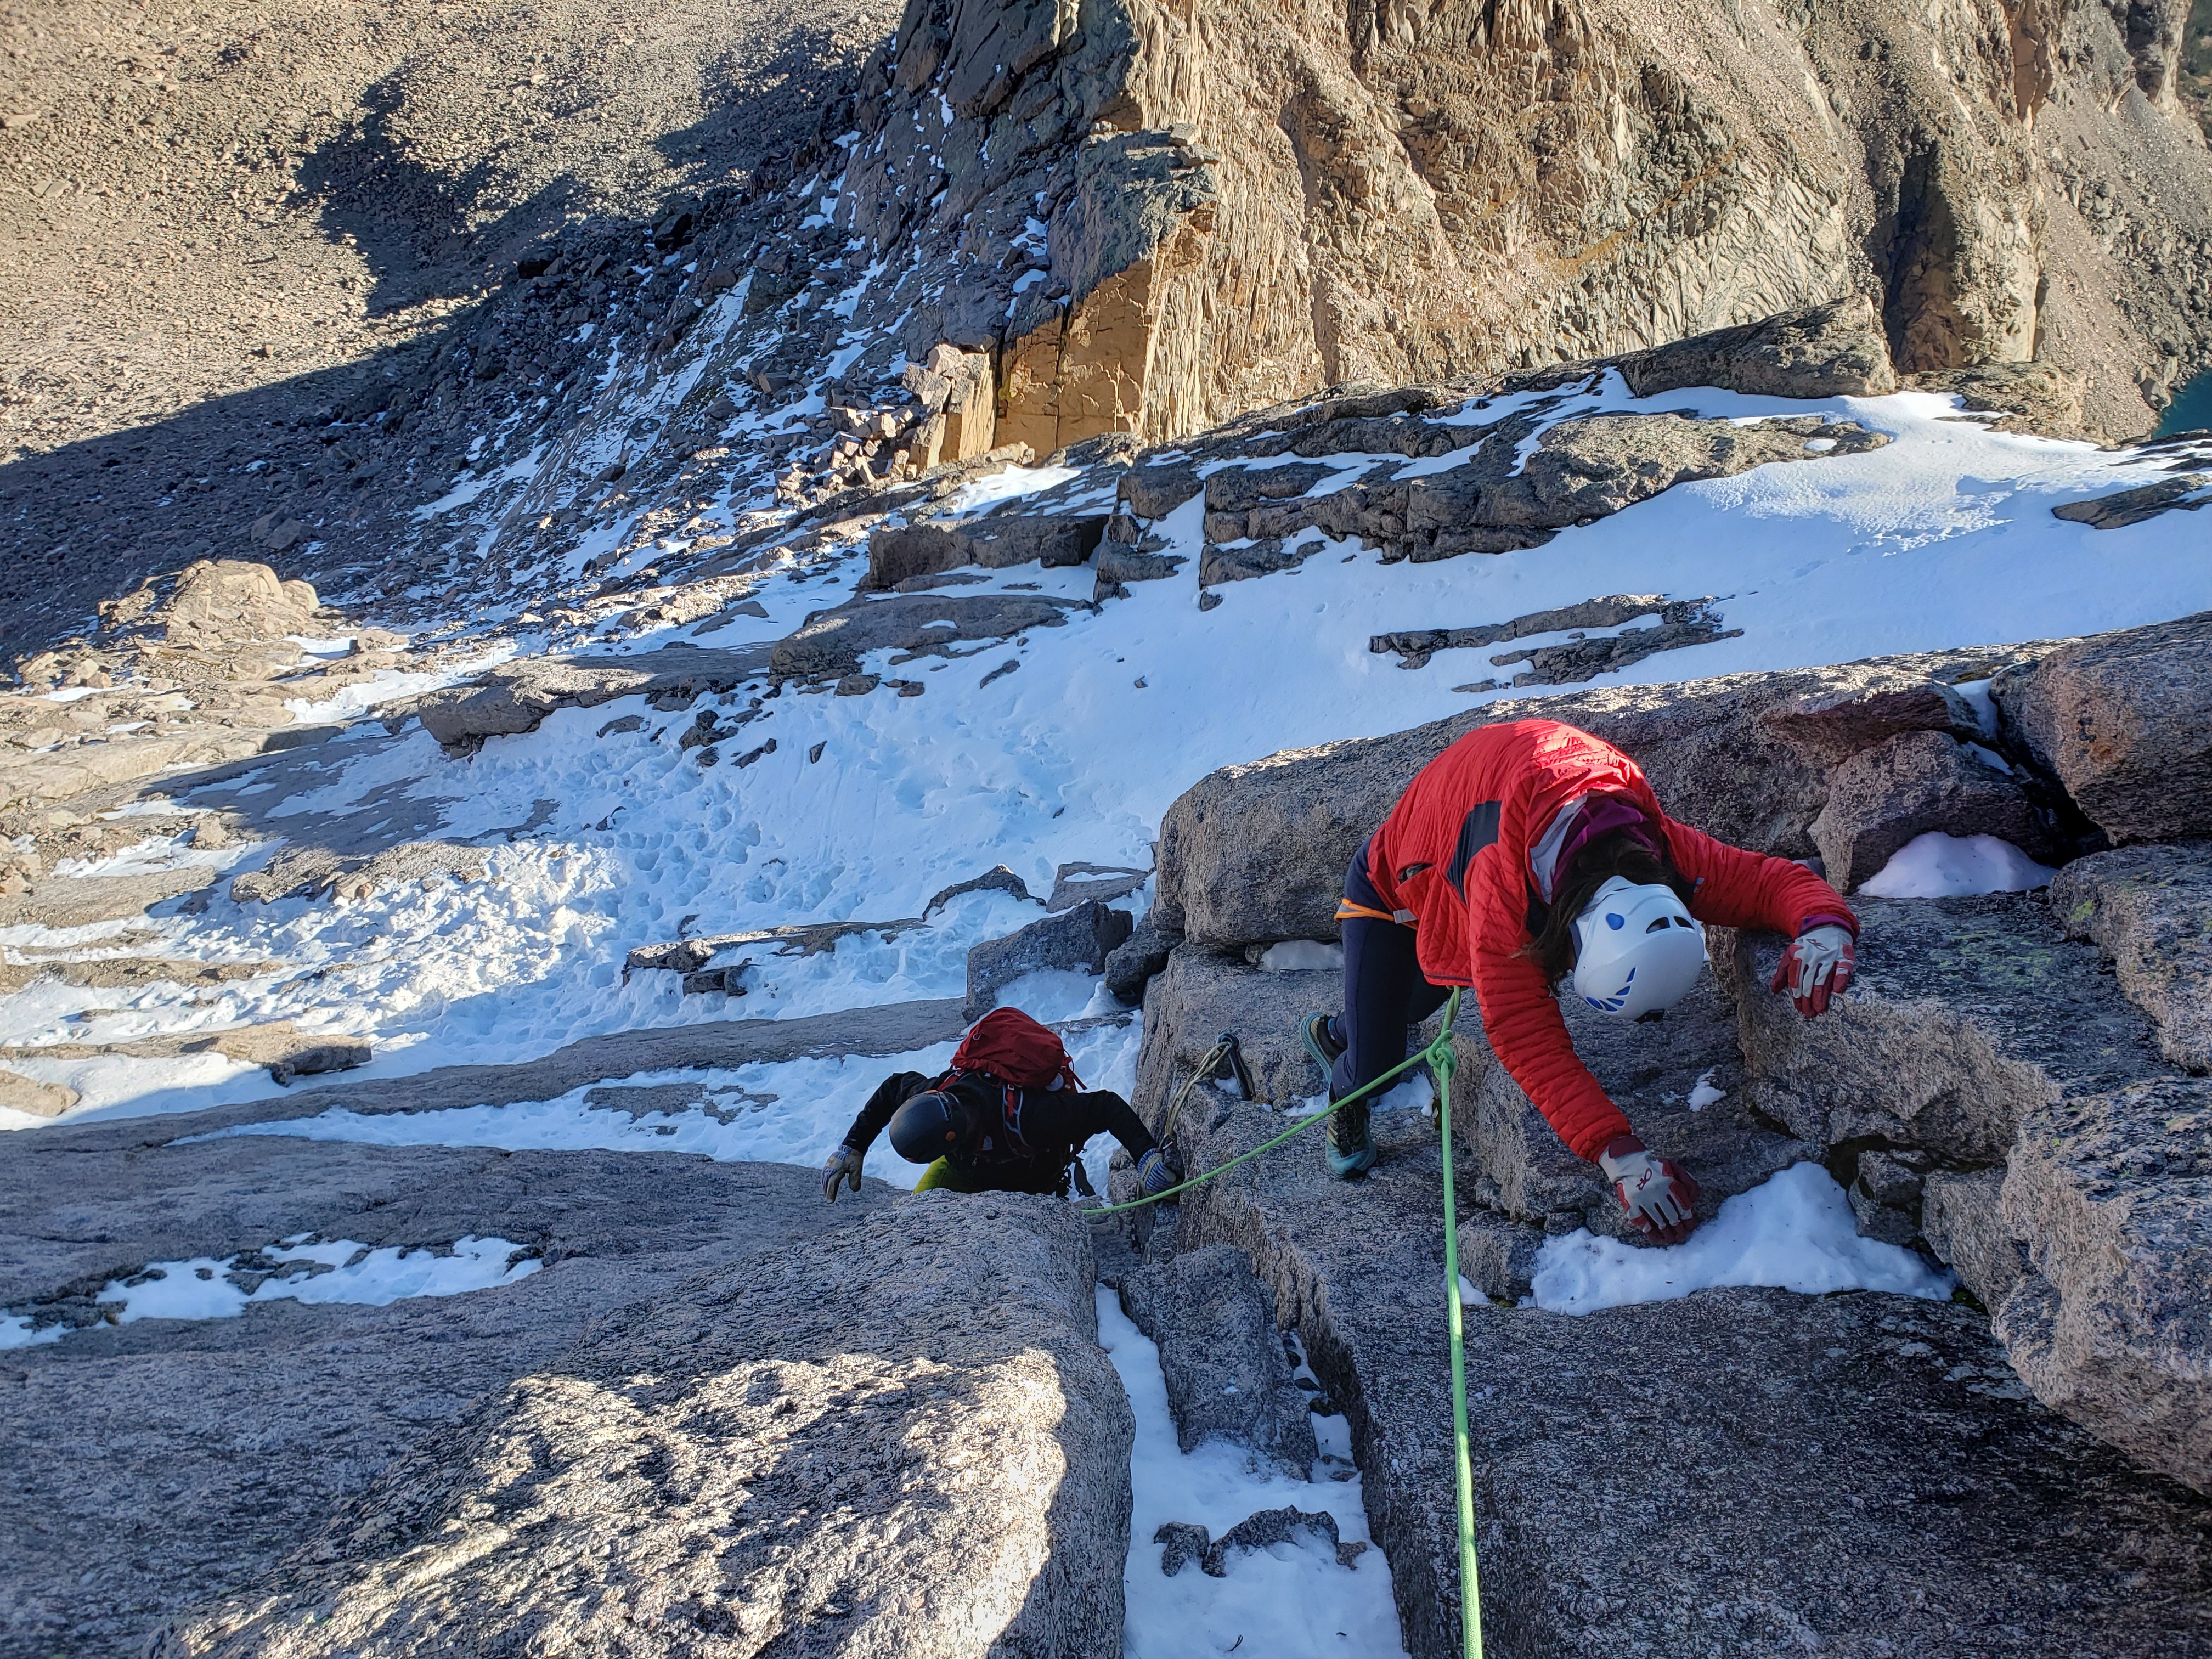
The Trough: This is my least favorite part of the route as you cross onto the West side of Long's Peak. It's steep and there are loose rocks. The fall exposure is less than other places but you definitely want your helmet here. You gain more of your elevation here though so it feels like you're getting somewhere. This can actually be a snow route by itself if approaching from Glacier Gorge
The Narrows: One of the most exposed sections as we curve around to the South part of Long's it's not terribly difficult having more of a sidewalk in the sky sort of quality. That's not to say there are no moves to be done but a good chunk feels like walking on well…narrow ledges.
The Homestretch: The last bit of climbing before the summit following a long joint in the rock that rises a few hundred feet to the summit area. It's a bit steep but the granite has good grip. As guides we'll usually short rope most people for this but it's straightforward class 3 as long as it's dry.
Best For: this is the route to do if you've not got a lot of climbing experience, not real sure of your fitness, or are really looking for the least technically demanding route. It has some excitement and exposure but the overall climbing movement is easy when it's in summer conditions
Late spring snow conditions on The Cables Route
The Cables Route: The Direct Route
Route Basics: The Cables route is an excellent route even if you don't consider yourself much of a climber. A lot of people find The Keyhole kind of tedious because you nearly circumnavigate the whole peak to get to the summit. The Cables is much more direct and trades some overall mileage for a bit more difficult climbing.
This also starts around The Boulderfield campsite instead of continuing towards The Keyhole you instead meander towards the obvious weakness in the north face between the Chasm View and Keyhole Ridge which is the obvious ridge that is the skyline (and a solid route in it's own right).
Once at the base of the steeper granite cracks you'll see some remnants of the steel eye bolts where the namesake cables used to go (guess running metal up a cliff on top of a lightning prone mountain wasn't the best idea). There are about two shorter pitches of climbing up a series of right facing corners. It could be done in a single pitch but not really worth the extra gear needed or rope drag.
Once at the top of the corners the angle eases off. From there you continue up following the path of least resistance trending a bit left as you go. There are occasionally cairns or obvious paths but this is where your mountaineering route finding skills come in handy. Aim for the weaknesses, don't just go straight up unless you want to intentionally make it harder.
Best For: This is a great route if you have a little climbing experience and want to save a bit of time on your summit day. It's also a good first alpine rock route with 5.4 climbing in dry conditions. This can also be a good winter or spring route when avalanche conditions allow it.
The Diamond: The Gem Everyone Wants
Route Basics: The Diamond is a prize on most alpine climbers tick list. While this gives a general overview of the formation it's not route specific. There are a variety of routes on the East face and The Diamond as hard as 5.14 but most are in the 5.10-5.11 range. This is almost always done in summer conditions. Once people see the snow is gone from Table Ledge it's go time.
The approach splits from the easier north face routes at Chasm Junction. I remember watching a train of headlamps follow us to Chasm Lake when we split here. Many people were upset when they realized they followed us like lemmings to the hardest climbs on the whole peak.
After you get to Chasm Lake you typically skirt it on the north or right side aiming towards Mills Glacier. This is where things get tricky. It's often quite firm snow but being only a couple hundred feet long people have all sorts of interesting ways of dealing with it. As a guide I'll usually bring an ice ax and then drop it down to the next person while I belay them. Not the most protected but for a climb that has no other real snow to be concerned with that's the level of security and weight I've come to accept. Earlier or in a bigger snow season you may have more. The old nut tool and rock method is a great way to really stress yourself out.
After you get over the snow you're heading up through the big trash chute known as the North Chimney. With an abundance of loose rock and some steep enough sections this is a place you want to ideally be first. While guides will rope up for this we have a lot of knowledge on how to avoid just dragging rocks all over the other parties. Make sure you know how to affectively use a rope if you're going to do it. Be careful not to confuse this with Field's Chimney which is a more obvious but smaller and steeper chimney farther left on the lower east face.
The North Chimney eventually brings you to Broadway Ledge which is where most climbs start from. If you're doing something like The Casual Route you're pretty much there. Most other routes start farther south or climbers left. A few start to the right more.
There are plenty of options once here. I have been shut down on routes on The Diamond but I can't say I've ever done a bad one. Many of the routes end on Table Ledge where you have the option to do double rope rappels back to Broadway or to continue to the summit via the upper part of Kiener's Route.
Best For: This is the route for solid rock climbers who can climb 5.11 or harder. Altitude will knock you down a peg here. My first attempt to climb Pervertical Sanctuary I was regularly climbing 5.11 on gear and had just onsighted my first 5.12 sport route. I still got whooped by the wide section and had to bail. While I got redemption climbing The Casual Route in a couple hours the next week do not underestimate how much altitude will bring down your max climbing ability. This is also not a climb for casual climbing. Being an east facing wall that's steep you don't get to see weather coming. You need good clear weather and to move quickly.
Some Less Popular Excellent Routes to Consider:
For Rock Climbers not ready for The Diamond: Try Keyhole Ridge or Stettner's Ledges to Kiener's. Keyhole Ridge is A little more exposed and interesting climbing than The Keyhole but not nearly as hard as anything on The Diamond. Stettner's to Keyhole is a nice, fairly direct way to climb rock all day but not at a terribly high standard.
For Ice Climbers: Do Alexander's or Field's Chimney and depending on snow and avalanche hazard link that to Notch Couloir for a bit before heading out onto Kiener's. For two summits you could also do Martha's Couloir on Mt. Lady Washington and link that up with The Cables Route for a full value day in early spring conditions. That one can be challenging to find in the right condition for both though.
When Should You Bail on a Long's Peak Climb?
Not every climb will have the right conditions and Long's Peak is not to be trifled with. Here are a couple things I look for when deciding to pull the plug on something as exposed as Long's Peak. Some are good enough to keep me from leaving the house while others I like to see if we can't still get some climbing done.
Winds over 40mph in Estes Park: Once the winds get above 50mph most people have a hard time standing up. Fighting the wind to keep your balance is not a great feeling at the edge of a 400' drop off. Now to be fair wind forecasts are not always accurate. I like to give people the option. We had a guide training in early 2026 where winds were forecast up to 70mph. It was training so we went anyways. There was wind but it wasn't nearly as bad as forecast and we ended up having some great climbing weather. Another guide who was supposed to guide that day ended up moving his trip unnecessarily. Sometimes the devil you know is better than the one you don't.
Extreme Snow or Avalanche: A lot of the routes in winter or spring are avalanche terrain and have high consequences. The late Charlie Fowler is well known for his tumble off the east face after his partner knocked him off with a falling chunk of snow. Only being saved by the soft snow at the base several hundred feet below. A lot of the couloirs and chimneys seem like obvious avalanche hazards but one thing to consider is how hard it is to get to the base. A 6 mile hike is hard. A 6 mile hike through 2 feet of powder is pretty much not happening. During a mountaineering course for a Denver area college we had to bail when the forecast snow actually happened. We turned around after trudging for several hours to Granite Pass.
Rain and Storms: While afternoon lightning is pretty common in summer we do our best to avoid it. We'll frequently get as early a start as possible so we're below treeline when afternoon storms hit. Certain climbs like The Diamond or other committing routes really need a good forecast. Even climbing the Homestretch on The Keyhole route can feel pretty scary with water or ice on it that can easily happen in those cool spring or fall days.
Conclusion
They call it Long's for a reason, and if you've read this far, you now understand why. There's no back door on this mountain, you have to earn it no matter which way you go. Every way up asks you to earn it in it's own currency, a few more cams and a longer rope on the technical end, an earlier alarm and a longer trudge through the Boulderfield on the easy one.
We've stood on the summit with clients who nearly cried at the top, and we've turned around a pitch from the top because the sky started getting a bit too dark. The mountains don't keep score so both of those are good days. Preparation is key to success but it does not guarantee it. Hopefully this information will prove useful in putting the odds in your favor.
If you'd rather have someone who's already made the mistakes in this article standing next to you instead of reading about them check some of the links to the routes Colorado Climbing Company guides. From The Keyhole to The Diamond reach out and we'll help you figure out the best options for your skills and time of year.
Related posts
Keep reading with connected field notes, trip reports, and climbing tips from the guide team.
